Smilebox software offers the option to burn your creation directly to a DVD. This premium feature is reserved for Club Smilebox subscribers only.
Please note: Burning directly to DVD requires a writable drive and a burning program on your computer. If you do not have one or you are using a Mac without iDVD, you can save your creation as a video file and burn using a different computer or send the file to a retailer.
For troubleshooting help, please see our article: Troubleshooting tips when burning to DVD
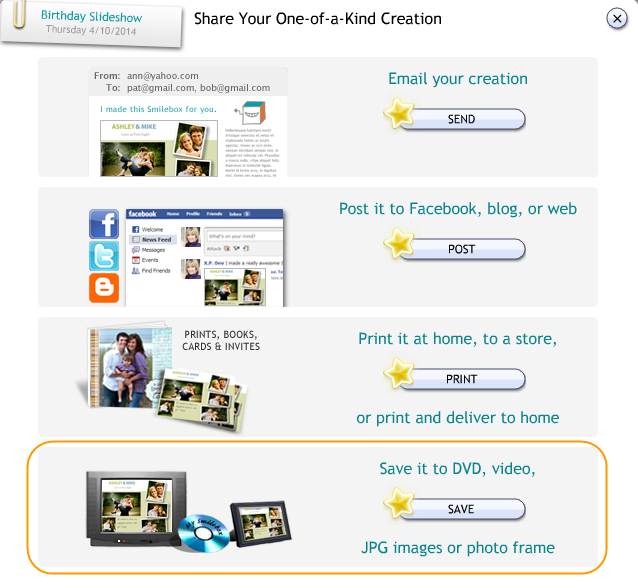
Step 1: Click the "Share, Print, or DVD" option and launch the DVD Maker


The Smilebox DVD Maker will open and the program will check your computer's performance.
Step 2: Record your creation
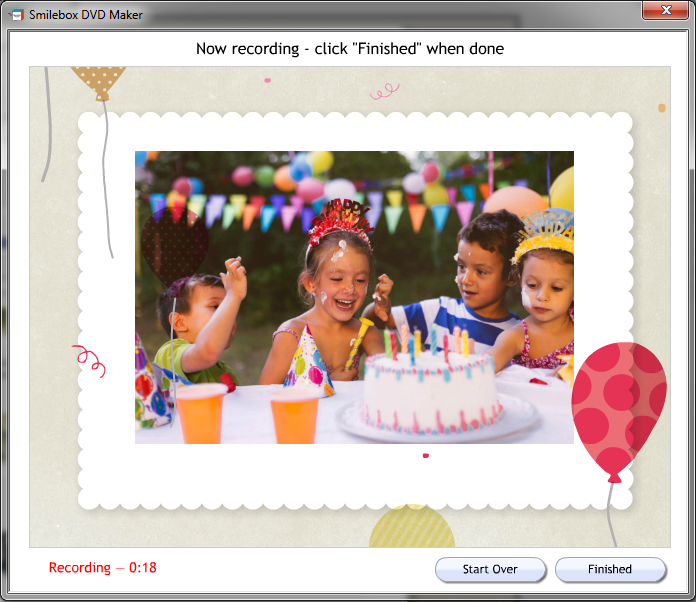
Click 'Record" to begin recording your creation. Be sure your speakers are turned up and all other audio is off.
What you record is what you will see in your final production.
Smilebox will begin recording your creation. You have the option to "Start Over" or click "Finished" when you are done.

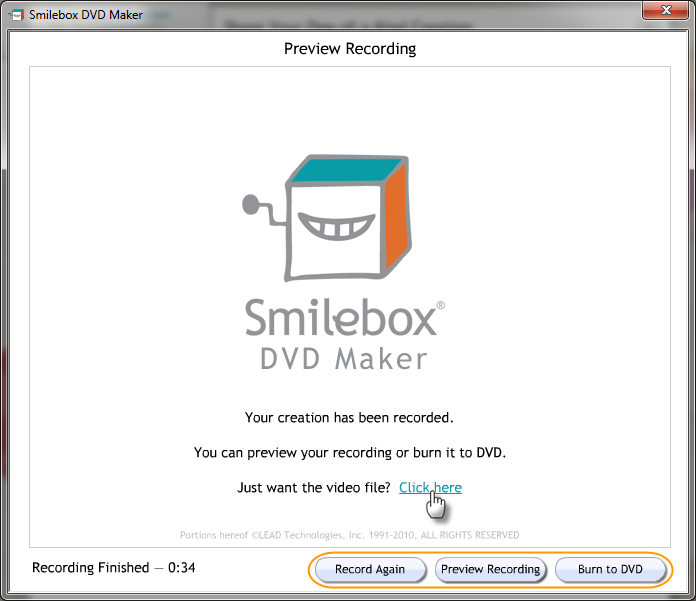
Step 3: Click "Burn to DVD" (or save as a video file)
The next screen will show the following options: Record Again, Preview Recording or Burn to DVD (see below).

From here, you will be prompted to input a blank writable DVD
Once you have completed the steps on the screen, you will see the following message: "Congratulations, your DVD has been created!"
We recommend playing it back on your computer or DVD player as a test.
If you experience any problems, please see our article: Troubleshooting tips when burning to DVD
For Mac users, the iDVD program is required to burn directly through Smilebox. If you do not have iDVD, please save your creation as a video file and use a third party DVD burning program.
To learn how to burn multiple creations to DVD, read our article: How to burn multiple creations to one DVD?