Here, you'll find plenty of tips and tricks to help you make the most of our slideshow designs.
Slideshows are ideal for sharing your photos (up to 400!) and videos with family and friends. For an extra special touch, subscribe to Club Smilebox and add songs from your own music collection.
If you're already a Club Smilebox subscriber, click here to learn more about your premium music options.
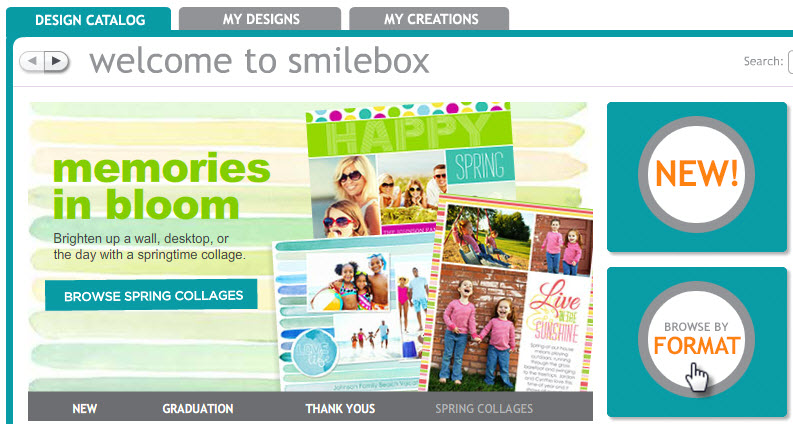
To find our Slideshow designs, open the Design Catalog and click "Browse by Format", then "Slideshows" (see below).

You can add photos or videos to your slideshow in one of two ways: Auto-fill or drag and drop.
To learn more about adding photos to a slideshow design, see our article: How to add photos (and slides) to a slideshow design
Time-saving tip!
We recommend that you add your photos/videos to the Photo Well and rearrange them in the order you want them to appear in your creation before using the Auto-fill feature. If you decline the Auto-fill feature but change your mind later, you can always exit the design and start a new one by selecting it from the Design Catalog and the Auto-fill feature will appear.
At this time, there is no direct way to transfer your photos (with captions) from one design to another, but the auto-fill feature may speed up the process of switching designs.
Slideshow Views
Smilebox offers 3 different views: Intro, Slide View, and Sorter View (see below)

Control options on the right-hand side vary depending on which view, so be sure to explore each one before personalizing.
Slideshow Controls
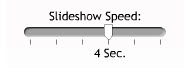
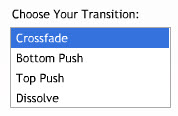
On the right-hand side, you'll find the Control Panel. Here, you can choose your title, music, color scheme, transitions, speed and more!
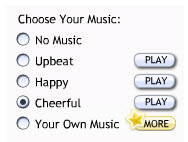

Most of our slideshows offer 3 song choices, however, some offer up to 5 songs. To find these designs, search for "5songs" in our Design Catalog.
If you'd like to include more, you can always stitch together multiple songs in a separate music editor and upload this file as a personal music selection.
To learn how to include your own music or choose one from our library, please see our article: How to import my own music or choose a song from the Music Library
To learn how to loop your creation, please see our article: How to loop/not loop a creation
Please note: These options and features vary depending on the design chosen.
Adding/Deleting Slides
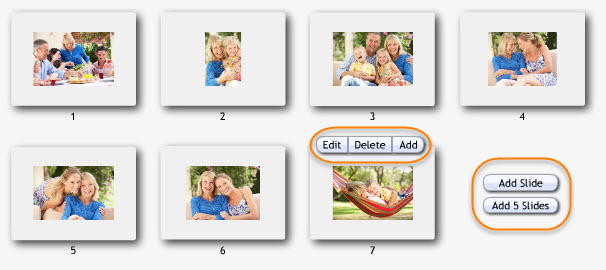
For the majority of our slideshow designs, you can add/delete/edit slides by selecting "Sorter View" on the bottom of the editor.
You can add more slides by clicking click "Add" next to the photo where you'd like to add a slide, or you can click "Add Slide" or "Add 5 Slides" at the end (shown below).
If you used the Auto-fill feature, the slides will be populated with the additional photos/video from your Photo Well. Otherwise, the slides will appear blank.
You can delete blank slides by clicking the "Delete" button above the slide you'd like to remove.
Please note: Some of our slideshow designs do not have a sorter page (Ex: Quick Share) and you can add/remove photos by using the "Number of Photos" slider on the right-hand side of the editor (see below).

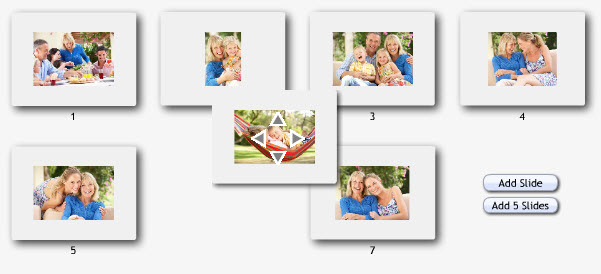
Ordering Slides
You can also reorder your slides by using the same drag and drop method in "Sorter View" once all of your photos are in place. At this time, it is not possible to move more than one slide at a time.
Adding Captions
You can add captions and headers in the "Slide View."
Some designs include "Universal text" which will appear on every slide.
If you do not want to include text on every slide, simply delete the text and it will not appear in your slideshow.
Captions can be customized below each photo (as shown below).

Some of our designs also offer the Text Toolbar feature. To learn more about this option (as shown), please see our article: How to use the Text Toolbar (choose the font, size, color, and alignment)
To learn more about our photo editing features, please see our article: How to edit my photo: (rotate, zoom, enhance, fix, b&w)
Text Slides
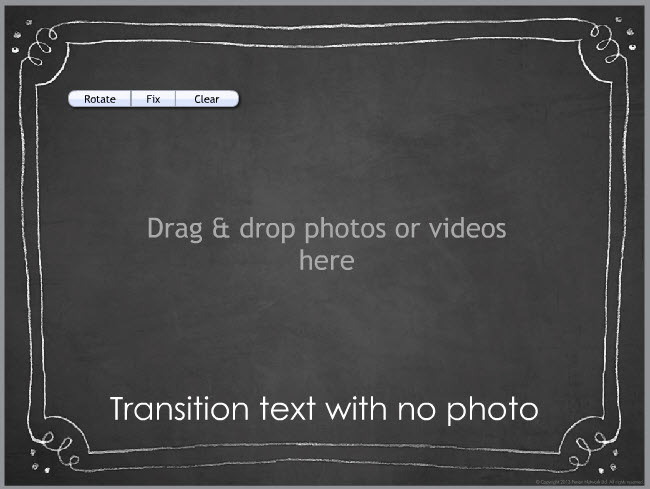
If you would like to add more text or a transition slide, you can either:
1. Add a slide with a caption only (example below). Only the background and caption with your message will appear when played back.
![]()
2. Use a third-party program (e.g. Word, PowerPoint, etc.) to write your message, save the text as an image to import into the Photo Well, and place it into the photo frame. (example below, created using PowerPoint)
![]()

To export a slide as a JPG image in PowerPoint 2013, choose File > Export > Change File Type > "JPEG File Interchange Format"
Please note: If you choose not to include text on a slide, some (but not all) of our designs will automatically remove the text box area in playback (see below for an example). To check if this feature is included, click "Preview" to see if your caption text boxes appear.
Editor View

Playback View
