In this article we will be addressing following RSVP issues (please refer to the corresponding section below for details):
1) Hide the guest list (name and email address)
2) Option to enter number of guests attending the party
3) Edit/delete the email address and/or name after sending
4) Don’t see the previous email addresses and RSVP responses, when I added new recipient email addresses to the creation
5) Post my RSVP invitation to Facebook; have my recipient play back the creation and RSVP their response
6) RSVP Invitations don’t have "Permanently remove this creation" in Account Information Page http://my.smilebox.com
7) Sending an automatic reminder notification
8) Entering an RSVP response on behalf of your recipient (guest)
9) Delete/update comments
10) Hide the RSVP responses and comments
11) In one click adding multiple email addresses to the “TO” box
12) Remove the Event Central Page or the RSVP option
Please note: RSVP Event Central is not available for Smilebox Pro users at this time
Details:
1) Hide the guest list (name and email address)
At this time, it is not possible to hide the guest list in the Event Central Page. Our development team is working on fixing this feature.
2) Option to enter number of guests attending the party
Sorry this feature is not possible. Your recipients have to enter in the comment section number of guests attending the party.
3) Edit/delete the email address and/or name after sending
At this time, you cannot edit/delete the email address or name after sending. The only choice you have is to create a new invitation and send it to your preferred guest list.
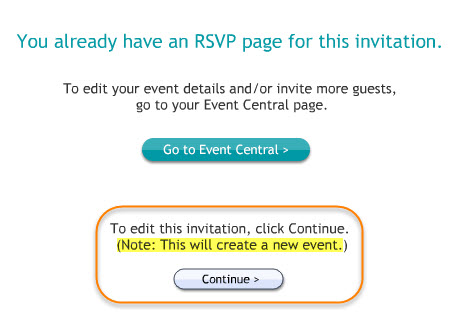
To do this, select “Open” creation from “My Creations” tab (Smilebox program).
Click “Continue” to edit (refer below)

Refer to our article: Find the creation link
If you want to see this feature added, please send us your feedback. We prioritize customer requests based on demand, so please let us know.
Please Note:
Any time you send a new creation, it will not transfer the responses from the previous one.
4) Don’t see the previous email addresses and RSVP responses, when I added new recipient email addresses to the creation
You can always playback your creation from http://my.smilebox.com and view your sent creations and recipient responses.
You might have by accident created a new invitation instead of selecting “Invite More Guests”.
To learn how to "Invite More Guests” to the same invitation please open the creation “Event Central Page”.
You have three places from where you can access your “Event Central Page”.
- Account Information page - http://my.smilebox.com; select “View Event Central Page”
- “Open” your creation from “My Creations” tab within the Smilebox program. Click on “Go to Event Central >”
- Once you send the creation, you will get an Email Confirmation copy. Playback the Email Confirmation copy and access the RSVP response by clicking the “RSVP to This Event” located at the top right-hand corner.
Once the “Event Central Page” is open, select “Invite More Guests” (as shown below) from top right-hand corner drop-down list.
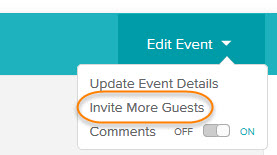
On your next “Invite More Guests” screen, add additional guest email addresses separated by a comma. Click on “Send” to complete your action.
To include a name, rather than just the email address, it must be formatted as follows:
"Guest 1" <email@address.com>, "Guest 2" <email@address.com>
5) Post my RSVP invitation to Facebook; have my recipient play back the creation and RSVP their response
Yes, you can post your RSVP invitation to Facebook but it will not have the RSVP feature. We have still not turned it ON in Facebook. They can playback the creation and use Facebook comments section to write their response.
As of now, the only option you have is to send your creation to your recipient’s email addresses to RSVP.
6) RSVP Invitations don’t have "Permanently remove this creation" in Account Information Page http://my.smilebox.com
Sorry, this is not possible yet to delete a sent/schedule to be sent invitation.
Refer to our article on - Find the creation link
7) Sending an automatic reminder notification
As of now there is no automatic way to set a reminder notification to your recipients (guests). You need to use our “Invite More Guests” feature and send the invitation to your recipients again by adding the email addresses to the “TO” field, separated by commas.
Please refer to our topic on Add additional email addresses to the invite in our article on – RSVP Q&A
8) Entering an RSVP response on behalf of your recipient (guest)
Sorry, only a recipient (guest) can open the creation from their email server (inbox) to respond. As the sender of the creation, you can’t record the response on their behalf, but you can add a comment to your invitation with your recipient’s response.
Please refer to our topic on Add a comment in our article on – RSVP Q&A
9) Delete/update comments
Sorry, it is not possible to delete/update comments. If you are the sender of the Smilebox RSVP invitation, you can only delete/update the “Message from the Host”.
Please refer to our topic on Update Event details in our article on – RSVP Q&A
Another alternative for you is to send us the creation link, and we can delete/deactivate the creation permanently for you. You can make a new creation from scratch and share with your recipients which will not have the undesirable comment that was left in your creation.
Refer our article- Find the creation link
10) Hide the RSVP responses and comments
Sorry, it is not possible to hide the RSVP responses and comments as of now. You can only turn Comments ON or OFF. This means not just you, but the whole group of recipients will be able to see the RSVP responses and comments.
11) In one click adding multiple email addresses to the “TO” box
At this time, it is not possible to import multiple email addresses in one click to the “To” box.
If you have multiple email addresses stored in another application (example: Excel or Notepad), using keyboard shortcuts, you can copy (Ctrl C) and paste (Ctrl V) it to the "TO" box. Please make sure to add commas in between the email addresses.
Please note: You can only add 200 recipient email addresses to the “TO” box at one given time.
12) Remove the Event Central Page and RSVP option
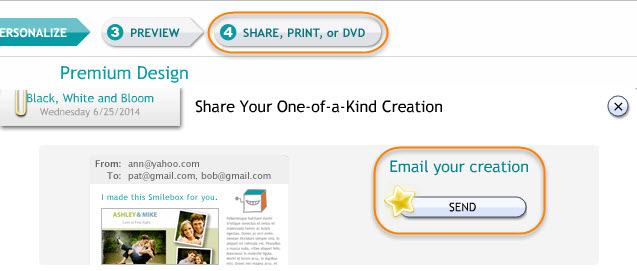
After you personalize and edit your invitation, when ready to share please select Share, Print or DVD and click Send under "Email your creation" (refer below).

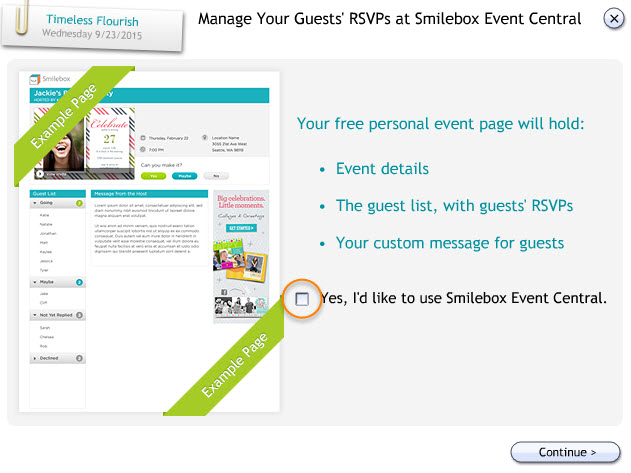
Before sending the creation, on the next screen, be sure to un-check the Smilebox Event Central option (shown below) and click on Continue.
It will NOT have the Event Central Page or the RSVP option, and you can use the invitation as a regular Smilebox creation.

Please Note:
Once you have already sent the creation you cannot remove the Event Central Page or the RSVP option.